Lessons Learned Building Operator Interfaces in FactoryTalk Optix
Key Highlights
- Why button behavior matters and how to avoid common implementation pitfalls.
- Which Optix objects can replace custom PLC logic and simplify development.
- How modern UI elements like option buttons and spin boxes can improve operator experience.

As industrial HMI software continues to evolve, engineers are gaining access to interface tools that previously required significant PLC programming and custom development. Features commonly found in modern web applications are making their way into industrial environments, creating new opportunities to improve operator usability while reducing engineering effort.
My first introduction to FactoryTalk Optix was several years ago. However, I recently got hands-on experience designing an Optix Panel for an automated robotic palletizing cell. While there is a learning curve for adding simple objects to your FactoryTalk Optix project, many features that previously required extra PLC code are now simplified in Optix...if you know where to look.
Some lessons were learned through successful implementations. Others came from troubleshooting unexpected behavior during commissioning and startup. In either case, each experience reinforced the same principle: the object you choose matters just as much as the tag you connect to it.
The following lessons highlight several FactoryTalk Optix user input objects, when to use them, and what I've learned from applying them in real-world industrial applications.
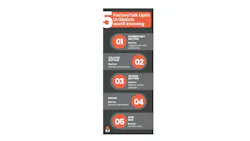
Lesson #1: Not every button should be a button
The most basic UI object in any HMI is a button. The idea is straightforward—an operator presses a button, and something happens.
FactoryTalk Optix offers multiple button types, starting with the standard Button object. All other button variants inherit many of the same properties and behaviors. The standard button is best suited for:
- Screen navigation
- Executing Optix Commands
- Triggering NetLogic routinesLaunching application-level actions
The primary configuration occurs within the Events section, where developers can associate actions with specific user interactions.
A Common Pitfall with Mouse Events
One of the first lessons I learned involved the implementation of MouseDown and MouseUp events. These events are not guaranteed to occur as a complete pair. An operator can press a button and drag their cursor or finger off the object before releasing. When this happens, only the MouseDown event may execute.
On a previous project, MouseDown set a control bit to 1 while MouseUp reset it to 0. PLC logic ignored HMI inputs until all command bits returned to 0. In certain situations, the bit remained active, effectively locking out all HMI commands.
The issue wasn't in the PLC code. It was in the button selection.
The Better Solution: Momentary Buttons
Momentary Buttons function similarly to their counterparts in FactoryTalk View and are ideal for:
- One-shot commands
- Jog controls
- Functions that should remain active only while pressed
The help documentation from Rockwell Automation lists the mouse events as the main ways to configure the momentary button. This can lead to issues as described above. Imagine you have a forward jog tied into a button. If the operator wants to stop jogging the axis, but slides their finger off the button before lifting, the axis will act as if the operator is still pressing the button.
The “correct” way to configure these buttons is with the “active” property that is truly only set when an operator is, for a lack of better words, actively pressing the button.
Lesson #2: Simple security can sometimes be enough
One object that does not have a direct counterpart in FactoryTalk View is the Delayed Button, which introduces a configurable delay that requires the operator to hold the button for a specified duration before the action executes.
While not a replacement for proper security implementation, it can be useful for:
- Accessing maintenance screens
- Revealing advanced settings
- Preventing accidental activation
In some applications, a simple delay is all that is needed to discourage unintended navigation while avoiding additional development complexity.
Lesson #3: Borrowing UI concepts from web design can improve operator experience
Several Optix input objects feel familiar to anyone with web-development experience, even though they have not traditionally been common in industrial HMIs.
Toggle Buttons, Checkboxes and Switches
These objects provide straightforward methods for controlling Boolean values.
The Toggle Button will change the state of a Boolean value based on its current state. The target tag is set as the “active” property. Checkboxes and switches provide similar functionality with alternative visual styles.
While the underlying functionality is simple, choosing the correct visual representation can improve operator understanding and reduce interface clutter.
Option Buttons
Option Buttons, commonly known as radio buttons, are especially useful when operators must select one choice from a group of mutually exclusive options.
Typical applications include:
- Recipe selection
- Machine mode selection
- Product configuration choices
- Process state selection
In traditional HMI platforms, achieving this behavior often requires additional PLC logic. In Optix, the functionality is built into the object. Multiple option groups can even coexist on the same screen when organized into separate containers. This is one of several examples where modern software design concepts are reducing engineering effort in industrial applications.
Lesson #4: Let the software handle input validation
Capturing operator input is a requirement of nearly every HMI application.
Editable Labels
Editable Labels combine functionality similar to both Numeric Input and String Input objects found in FactoryTalk View. The tag you want to capture the input is tied into the “Text” property. Optix will automatically format the tag based on the data type and reject inputs that are invalid. This reduces the need for additional validation logic elsewhere in the application.
Text Boxes
Text Boxes provide similar functionality while introducing additional user experience features, including:
- Password masking
- Placeholder text
- Enhanced formatting options
These capabilities make Text Boxes particularly useful for authentication workflows and guided operator input.
One simple but useful reminder: If you just want plain text that will not be changed by the operator, use the “Label” object. This is a great choice if you are trying to recreate a multi-state indicator. Text can be dynamically selected from a list using a Key-Value converter.
Lesson #5: The best operator input is often the simplest
One of my favorite discoveries in FactoryTalk Optix has been the Spin Box. Spin Boxes combine two common operator interactions into a single object:
- Incrementing values with arrow controls
- Direct numeric entry
In previous HMI platforms, achieving similar functionality often required multiple objects and supporting PLC logic. In Optix, it is handled by a single control.
I have found Spin Boxes particularly useful for:
- Recipe editors
- Manual control screens
- Setpoint adjustments
By reducing the number of interface elements on screen while maintaining flexibility, Spin Boxes create a cleaner experience for operators and a simpler implementation for developers.
Lessons Learned
One of the biggest lessons I learned while developing FactoryTalk Optix applications is that successful HMI design is no longer just about connecting tags to graphics. Modern visualization platforms provide a growing collection of interface tools that can reduce PLC code, simplify operator interactions, and improve maintainability when used appropriately.
Many of these objects have existed for years in traditional web and software-development environments, but they are relatively new to many industrial automation engineers. Understanding where they fit and where they can replace custom logic can significantly reduce development time while creating a more intuitive experience for operators.
As FactoryTalk Optix continues to mature, the learning curve is less about understanding what each object does and more about understanding when to use it. The lessons shared here represent a few of the discoveries that stood out during real-world project implementation and hopefully help other engineers avoid some of the same pitfalls while building their own operator interfaces.
BONUS TIP: If you've already spent time formatting an object and realize you've selected the wrong type, don't start over. Right-click the object in the project tree, select Refactor, then Change Type to convert it while preserving much of your existing work. It's a small feature, but one that can save a surprising amount of development time.
About the Author
 Dharma Prime
Dharma Prime
Concept Systems
Dharma Prime is a Senior Controls Engineer with Concept Systems, a certified member of the Control System Integrators Association (CSIA). She’s specializing in industrial automation, robotics and modern HMI development. Her experience includes designing and commissioning visualization systems for manufacturing applications across multiple industries. For more information about Concept Systems, visit its profile on the Industrial Automation Exchange.
 Leaders Logo
Leaders relevant to this article: